ssh
配置公钥 和密钥 可以登录服务器不需要密码
ctrl +d 退出用户
1 2 3 // 先给root一个密码
1 2 3 4 5 6 7 8 9 10 //在root下
ctrl +X保存 之后shift+Y enter 退出
可以在root 下进入skl 用户 su skl
1 2 //重启服务
1 2 //生成公钥和私钥
1 2 //配置文件 修改默认端口
改过端口后 连接服务器会连不上 出现
这时候就要虚入输入端口号了
ssh -p 8888 ubuntu@ip地址
1 2 3 4 5 6 7 8 9 //更新
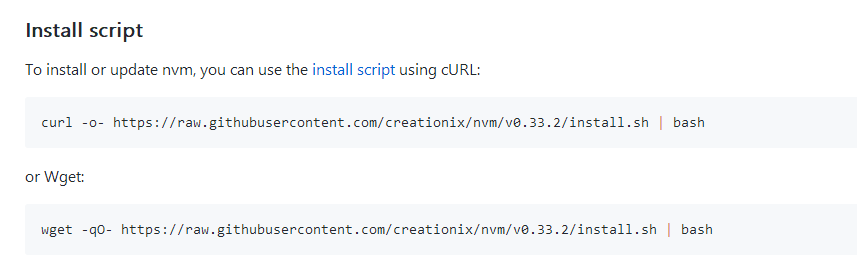
curl -o- https://raw.githubusercontent.com/creationix/nvm/v0.33.8/install.sh | bash
装完后若发现nvm 不是一个命令 在来一个命令窗口
安装好nvm 就可以安装nodejs了
nvm install v8.2.1
指定一下node版本
nvm use v8.2.2
设置一下默认
nvm alias default v8.2.1
设置成淘宝 用一个nrm 包
npm –registry=http://registry.npm.taobao.org install -g nrm
nrm use taobao
安装一些包
npm i pm2 webpack gulp grunt-cli -g
查看全局安装过的包 npm list -g -depth 0 创建 app.js 如下
创建 sudo vi app.js
1 2 3 4 5 6 7 8 var http=require ('http' );var server=http.createServer (function (req,res ) {writeHead (200 ,{'Content-Type' :'text/plain' })end ('Hello SKL\n' );listen (8081 );console .log ('Server running at http://ip地址:8081' );
之后 node app.js
使用nginx 80端口
停止apache 服务1 2 3 4 5 移除Apache 2
1 2 下载 nginx
配置
cd /etc/nginx/
cd conf.d
sudo vi shoukailiang-cn-8081.conf1 2 3 4 5 6 7 8 9 10 11 12 13 14 15 16 17 18 19 20 21 upstream blog{server 127.0.0.1:8081 ;server {listen 80 ;server_name ip地址;location / {proxy_set_header X-Real-IP $remote_addr ;proxy_set_header X-Forwarded-For $proxy_add_x_forwarded_for ;proxy_set_header Host $http_host ;proxy_set_header X-NginX-Proxy true ;proxy_pass http://blog;proxy_redirect off ;
sudo nginx -s reload 重启 nginx
之后输入ip地址 就可以看到了 把8081 的服务都导向到Nginx的80端口
让 Nginx的版本信息在浏览器的头信息中不那么明显
1 2 3 cd /etc/ nginx
去掉
MongoDB ubuntu16.04 https://docs.mongodb.com/manual/tutorial/install-mongodb-on-ubuntu/
1 2 3 4 5 6 7 8 9 10 11 12 13 14 命令:/etc/ apt/sources.list.d3.4 .list (注意看安装时的版本)//mi rrors.aliyun.com/mongodb/ apt/ubuntu xenial/m ongodb-org/3.6 multiverse// 改过镜像后要upadte一下
1 2 sudo service mongod start
1 2 3 若遇到无法写入。加sudo
1 2 3 // 修改/etc/m ongod.conf19997
文件上传 1 2 scp ./test.html shoukailiang@ip 地址0 :/home/shoukailiang/test 8888 ant-mobile-recruit-app.tar shoukailiang@ip 地址:/home/shoukailiang/
打包
tar
1 2 3 4 5 6 7 8 9 10 -c : 打包 -v : 显示过程 -f : 指定打包后的文件名 -x : 解打包 -z:压缩为.tar.gz格式
1 2 3 4 5 6 7 .tar japan.tar .gz japan.tar .tar
配置可以让域名访问服务器 1 2 3 4 5 6 7 8 9 10 11 12 13 14 15 16 17 18 19 20 21 22 23 cd /etc/nginx/conf.d :3000 ; set _header X-Real-IP $remote_addr; set _header X-Forwarded-For $proxy_add_x_forwarded_for; set _header Host $http_host; set _header X-NginX-Proxy true ; //blog ; // 重启nginxreload
配一下防火墙 1 2 3 4 5 6 7 8 9 10 11 12 13 14 15 16 17 18 19 20 21 22 23 24 25 26 27 28 29 30 31 32 33 34 35 36 37 38 39 40 41 42 43 44 45 46 47 48 49 50 51 52 53 54 sudo apt-get update && sudo apt-get upgrade// 先清掉所有的规则/etc/iptables.up.rules ------------------------------------------ --state ESTABLISHED,RELATED -j ACCEPT--dport 443 -j ACCEPT--dport 80 -j ACCEPT--icmp-type 8 -j ACCEPT--state NEW --dport 8888 -j ACCEPT--destination-port 27017 -m state --state NEW,ESTABLISHED -j ACCEPT--source-port 27017 -m state --state ESTABLISHED -j ACCEPT--destination-port 3000 -m state --state NEW,ESTABLISHED -j ACCEPT--source-port 3000 -m state --state ESTABLISHED -j ACCEPT--destination-port 9093 -m state --state NEW,ESTABLISHED -j ACCEPT--source-port 9093 -m state --state ESTABLISHED -j ACCEPT--limit 5/min -j LOG --log-prefix "iptables denied:" --log-level 7--dport 80 -i eth0 -m state --state NEW -m recent --set --dport 80 -i eth0 -m state --state NEW -m recent --update --seconds 60 --hitcount 150 -j DROP------------------------------------------- /etc/iptables.up.rules // 载入规则// 查看防火墙状态// 激活/etc/network/if-up.d/iptables // 让他开机自动启动----------------------------------- /etc/iptables.up.rulea ----------------------------------------------------- /etc/network/if-up.d/iptables
1 2 3 // react的话在config 里面的webpackDevServer.config .js里面加一个true
https配置 1 2 3 4 5 6 7 8 9 10 11 12 13 14 15 16 17 18 19 20 21 22 23 24 25 26 27 28 29 30 31 32 33 34 35 36 37 38 39 // 在腾讯云上申请证书(具体详见文档:https:// cloud.tencent.com/document/ product/400/ 4143 )// 把证书下载下来上传到服务器// 修改配置文件127.0 .0.1 :3000 ;80 ;301 https:// www.shoukailiang.cn$request_uri ;443 ;/home/ shoukailiang/https-key/ 1 _www.shoukailiang.cn_bundle.crt;/home/ shoukailiang/https-key/ 2 _www.shoukailiang.cn.key;5 m;1 TLSv1.2 ; $remote_addr ;$proxy_add_x_forwarded_for ;$http_host ;// blog;
node 后端启动 1 2 3 nohup npm start &// segmentfault.com/q/ 1010000004455598